
It Takes Two Queen Wasp: Boss Fight Guide and Tips
Beat the It Takes Two queen wasp with coordinated sap attacks, smart rail movement, and clear counters for every phase. Learn how to break the final chain.
Jump to
How to Beat the Queen Wasp
The It Takes Two queen wasp fight turns a familiar sap-and-match combo into a moving target surrounded by weapons made of insects. To win, Cody must coat the marked weak points with sap while May detonates them, and both players must use the rails to survive key attacks. This It Takes Two queen wasp guide covers the opening targets, the changing swarm attacks, and the chain you need to destroy to finish the battle.
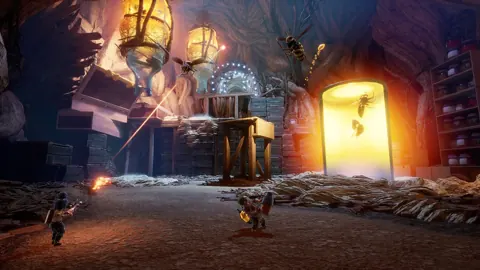
You encounter the Wasp Queen during The Tree chapter, after teaming up with the beetle. Your weapons remain central to the fight: Cody carries the sap gun, and May carries the match gun. The challenge comes from keeping those attacks coordinated while the arena changes around you.
| Player | Combat responsibility | Movement responsibility |
|---|---|---|
| Cody | Coat exposed weak points and hostile swarms with sap | Ride the side rails to reach the Queen’s back |
| May | Ignite Cody’s sap with the match gun | Follow the rail route to detonate rear targets |
| Both | Clear threatening formations together | Jump sweeping attacks and use rails during the fire attack |
The essential sequence is sap, then ignition. Shooting the robot without coordinating that sequence misses the fight’s central damage mechanic.
Before committing to a target, tell your partner which side you are attacking. Use short calls such as “back patch,” “front patch,” and “chain.” Keep the target description consistent so May knows where Cody has placed sap, especially when the two screens show different sides of the boss.
Official page: It Takes Two (ea.com)
Opening Phase: Reach the Weak Points on Her Back
The Queen opens by sending out a swarm that forms a hammer. Dodge the hammer or destroy the swarm together, then look for the rails on either side of the robot.
 Image: Steam / Hazelight Studios
The opening objective in the It Takes Two queen wasp battle is behind her. Two red X marks identify the rear weak points, so standing directly in front of the boss will not give you the angle you need.
Follow this sequence:
- Cody takes a side rail. Ride around to the Queen’s back.
- Cody coats the red X marks. Aim the sap at the marked patches.
- May follows around the rail. Bring the rear targets into view.
- May ignites the sap. Shoot the coated weak points to damage the Queen.
- Repeat the coordinated attack while handling the swarm. Keep watching the hammer between damage opportunities.
Call out when the sap is on the patch. May needs a visible, coated target before firing, and Cody needs to keep track of which patch the pair is attacking.
If the hammer interrupts your setup, handle the immediate threat before returning to the boss. Avoid staying fixed on a weak point while a formation closes in. The same weapon combination used against the Queen also helps destroy the attacking swarms.
Escape the Fire on the Rails
After the Queen loses roughly a third of her health, she raises her rear and releases fire across the arena.
Get onto a rail when this attack begins. Jumping over the flames or trying to dodge through them will not solve it. The rails provide the escape route for both characters.
Watch the Queen’s body position as well as the smaller enemies. Her raised rear signals a change that demands movement, even if you were about to finish another sap explosion. Break off the attack and take the rail.
Middle Phase: Attack the Front and Read the Swarms
After the fire sequence, the fight adds a hammer swarm and a horizontal bar formation. The bar sweeps across the arena near floor level, so jump over it as it approaches.
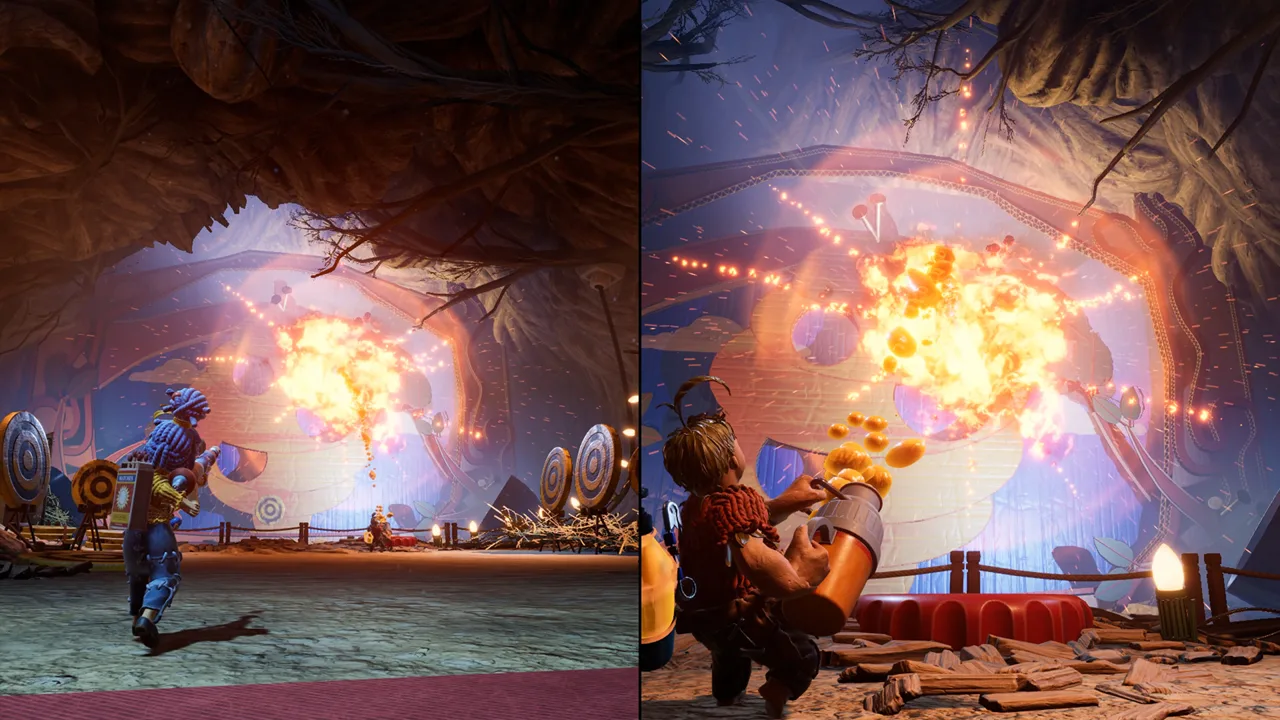 Image: Steam / Hazelight Studios
The front of the Queen now presents two red X weak points. Apply the same coordinated weapon sequence: Cody coats a marked patch, then May shoots the sap.
This stretch of the It Takes Two queen wasp fight demands attention in two directions. You need to see the target on the robot while also tracking the shapes forming around the arena.
| Attack or formation | What to watch for | Response |
|---|---|---|
| Hammer swarm | Wasps assemble into a hammer | Dodge it or destroy the formation together |
| Horizontal bar | A low bar swings across the arena | Jump over the sweep |
| Fire attack | The Queen raises her rear before releasing flames | Get onto a rail |
| Bomb strike | Wasps hit from above and spread into an expanding hexagonal formation | Jump over the expanding edge |
| Scissors | The swarm takes the shape of scissors | Run away from the formation |
When wasps cover a weak point, clear the shielding swarm before trying to attack the patch behind it. Call out the obstruction so both players work on the same problem.
Survive the Bomb and Scissor Sequence
Around half health, the Queen launches a bombardment. Wasps strike the arena from above, and each impact sends a hexagonal formation outward.
Watch the expanding edge and jump over it. Shift your attention from the boss’s patches to the floor during this sequence; the immediate job is avoiding the moving hazards.
After several bomb attacks, the formations become scissors. Run from them while watching their position. Do not carry the jump response from the expanding hexagons into every attack—the scissors require you to keep moving away.
When the usual arena view returns, resume attacking the marked weak points. Continue using the rails to reach the back when needed, and coordinate explosions on the front when those patches are exposed.
Keep the rhythm simple: identify the threat, avoid or clear it, then return to a visible weak point.
Final Phase: Destroy the Chain Above the Queen
With about a third of her health remaining, the floor falls away. The battle continues on a rail circling the Queen.
 Image: Steam / Hazelight Studios
At this point, the It Takes Two queen wasp fight changes targets. Attack the bottom of the chain holding the robot up—the section closest to her body.
Clear the swarms interfering with your shots, coat that lower chain section with sap, and have May ignite it. Repeat the combination until the chain breaks and the Queen falls.
| Stage of the fight | Target | How to damage it |
|---|---|---|
| Opening | Two red X marks on the back | Reach them by rail, apply sap, then ignite |
| Middle | Marked patches on the front and back | Clear shielding wasps and detonate sap on exposed patches |
| Final rail sequence | Bottom of the suspension chain, nearest the Queen | Apply sap and ignite it repeatedly until it breaks |
The chain is easy to overlook because the earlier phases train you to search the robot’s body for patches. Once the floor disappears, make the target switch explicit: “lower chain.”
Keep watching the swarm formations while circling. If insects interfere with the attack, clear them together, then return your aim to the chain. Resist the urge to spend the entire rail sequence firing at the Queen’s remaining body panels.
Cody should announce when the chain is coated, and May should confirm the detonation. That brief exchange helps both players track the current target while their viewing angles keep changing.
Co-op Mistakes That Interrupt Your Damage
The It Takes Two queen wasp encounter combines target selection, paired weapons, and movement. When an attack attempt stalls, check which part of that sequence broke down before repeating it.
| Problem | What to change |
|---|---|
| May fires before Cody coats the target | Call “sap ready” before taking the ignition shot |
| Both players remain in front during the opening | Use a side rail to reach the rear X marks |
| Wasps cover the patch you are aiming at | Clear the shielding formation together |
| Fire catches you on the arena floor | Move onto a rail as the Queen raises her rear |
| You keep shooting body patches after the floor collapses | Switch to the lower suspension chain |
Name the Target Before Shooting
Say where you are aiming before loading a patch with sap. “Front” or “back” establishes the side; naming the specific patch keeps the follow-up shot focused.
Use the split screen to check your partner’s view when their target is unclear. If Cody is coating a rear patch while May is looking at the front, coordinate the rail movement before trying to finish the explosion.
Match Your Movement to the Attack
Keep the counters separate in your mind. Jump the horizontal bar and expanding bomb formations, run from scissors, and take a rail for the fire.
Trying to solve every hazard with the same movement makes the changing attacks harder to manage. Watch the shape the wasps form, then respond to that shape.
Clear What Blocks the Next Shot
Handle a swarm when it threatens your position or covers the weak point. Once that obstacle is gone, bring both weapons back onto the intended target.
Avoid splitting attention between unrelated targets during a damage attempt. Cody’s sap and May’s ignition need to meet on the same patch, swarm, or chain section to complete the combination.
What Happens After the Wasp Queen Fight?
Story spoilers follow.
Defeating the It Takes Two queen wasp boss reveals that the enormous enemy is a robot operated by a bumblebee. Breaking the chain ends the battle against the machine and leads into a confrontation involving the bee, the wasps, and the squirrels.
During the aftermath, Cody shoots the nectar tank to help the bee escape the wasps. The squirrels then turn against Cody and May, sending the pair toward their next escape aboard a plane.
The post-fight sequence also pays off the beetle’s earlier motivation: nectar brought it into the conflict, and the Queen’s supply remains part of the chaos after the robot falls.
The encounter’s combat ends with the chain. Once it breaks, watch the unfolding scene rather than searching for another set of red X targets.
FAQ
How do you damage the It Takes Two queen wasp?
Cody must coat the marked weak points with sap, and May must ignite that sap with her match gun. Start with the red X marks on the Queen’s back, attack exposed front and rear patches as the fight continues, then target the lower suspension chain during the final rail phase.
How do you avoid the Wasp Queen’s fire?
Get onto one of the side rails when the Queen raises her rear and releases flames. Jumping over the fire or dodging through it does not avoid the attack.
What should you shoot when the floor disappears?
Shoot the bottom section of the chain holding up the Queen, closest to the robot. Cody applies sap, May detonates it, and the pair repeats that sequence until the chain breaks.
Is the Wasp Queen actually a wasp?
The boss is a mechanical wasp operated by a bumblebee. Her identity is revealed after you destroy the suspension chain and bring down the robot.
Continue with
 It Takes Two Vacuum Boss: Complete Co-Op Fight GuideBeat the It Takes Two vacuum boss with clear co-op roles, mine-return tactics, and tips for dodging shockwaves, explosive tacks, and falling lint. Team up!
More in Bosses

It Takes Two Bosses: Fight Strategies and Co-Op Tips
Beat It Takes Two bosses with clear co-op strategies for Vacuum, Toolbox, Wasp Queen, Moon Baboon, and Joy. Learn attack counters and each player's role.
It Takes Two Joy Boss Guide: Beat Every Phase Together
Beat the It Takes Two joy boss with phase-by-phase tips for Cody and May. Clear poison, dodge crushing plants, and remove infection to save Joy together.
Continue exploring
It Takes Two Abilities: Cody and May's Powers Explained
Explore It Takes Two abilities for Cody and May, from sap guns and magnets to time control. Learn how their powers work together to solve co-op challenges.
It Takes Two Clock Birds: Puzzles and Flying Guide
Solve the It Takes Two clock birds puzzles, learn the animal symbol order, fly between towers, and break shield mechanisms with this co-op walkthrough.
Join the community
Official channels for news, updates and player help: