It Takes Two Kaleidoscope Puzzle: Complete Walkthrough
Solve the It Takes Two kaleidoscope puzzle with steps for glowing floor tiles, the mirror room, and rotating pillars. Get Cody and May across the gap.
Jump to
Solve the First Kaleidoscope Floor Puzzle
The It Takes Two kaleidoscope puzzle can stop your progress with a gap that looks impossible to cross. Connect the colored hexagons on the side walls by having Cody and May stand on the missing floor tiles, and a route across will appear. The trick to the It Takes Two kaleidoscope puzzle is recognizing the incomplete illuminated line beneath all those distracting reflections.
You reach this area during Hopscotch in Rose’s Room, after the fidget spinner obstacle course. Once you finish that course and raise the yellow platform together, Dr. Hakim sends you into the kaleidoscope. Continue through the shifting passage until you reach the room with the hexagonal floor and the large gap.
Here, the wall markings and floor panels belong to the same puzzle. Your goal is to complete an uninterrupted connection between the differently colored hexagons on opposite sides of the room.
Step-by-Step Solution
- Stop moving and let the floor settle. Wait for the tiles activated by your movement to reset so you can distinguish them from the panels that remain illuminated.
- Find the colored wall hexagons. Look at both side walls for the hexagons that stand out from the surrounding pattern.
- Trace the connection across the floor. Use the already illuminated panels to identify the intended route between those wall markers.
- Locate the missing links. Find the blank floor hexagons that interrupt that route.
- Position Cody and May together. Have each player occupy a needed tile at the same time.
- Cross once the route appears. Completing the connection creates the way forward.
| Puzzle element | What it means | What to do |
|---|---|---|
| Differently colored wall hexagons | Endpoints of the connection | Trace a route between them |
| Floor tiles that remain lit | Existing sections of the route | Include them in your solution |
| Blank tiles interrupting the line | Missing connections | Stand on them with Cody and May |
| Completed illuminated connection | Solved floor puzzle | Use the newly created crossing |
Result: A path appears across the gap, letting you reach the next floor challenge.
Keep your attention on the ends of the illuminated sections. Randomly walking over the floor adds visual clutter, making the intended connection harder to read. Before either player moves, agree on which blank tile each character will occupy.
For this part of the It Takes Two kaleidoscope puzzle, use the wall markers to establish the direction, then inspect the floor for the breaks. Trying to reproduce every reflected shape around the room only distracts you from the connection you need.
Official page: It Takes Two (ea.com)
Connect the Next Two Illuminated Lines
After the opening crossing, the next floor challenge uses the same connection mechanic with a more direct clue: two illuminated sections need to be joined.
 Image: Steam / Hazelight Studios
Look for the hexagon that sits between their ends. This time, focus on that interruption rather than searching the entire floor for a new design. The important question is whether your chosen panel makes the existing sections touch continuously.
The It Takes Two kaleidoscope puzzle becomes easier to read when you separate its decorative patterns from its active tiles. Let the room settle, identify the persistent lights, and work outward from them.
Step-by-Step Solution
- Reach the next set of wall patterns. Continue along the route opened by the previous puzzle.
- Identify the two lit floor sections. Follow each section toward the space separating them.
- Find the connecting hexagon. Look for the blank panel that joins the two lines.
- Stand on that panel. Hold the position while checking that the illuminated route is continuous.
- Continue toward the purple exit. Once the connection is complete, follow the opened route.
| Stage | Final arrangement | Result |
|---|---|---|
| Two separated illuminated lines | The intervening hexagon is activated | The floor connection is completed |
| Completed connection | No break remains between the lit sections | You can continue toward the purple exit |
Result: You can proceed through the purple exit to the mirror room.
If you and your partner disagree about the correct tile, describe its position relative to the existing lights. “Between the two lit ends” is more useful than “over here,” especially when each player is looking from a different angle.
Let one player hold position while the other checks the connection. If both characters keep moving, you lose the stable arrangement needed to judge whether the line is complete.
Carry that habit into the next room: identify the endpoints, locate the interruption, and move only when you know which connection you are trying to make.
Complete the Mirror Room Connection
The mirror room changes how the space looks, but the objective remains familiar: connect the illuminated lines.
 Image: Steam / Hazelight Studios
Reflections can make a floor section seem more complicated than it is. Keep checking the surface beneath Cody and May, then use the surrounding pattern to understand where that connection needs to go.
For the mirror-room portion of the It Takes Two kaleidoscope puzzle, follow the same process you used before. Start with the lights already present and work toward a continuous route.
Step-by-Step Solution
- Pause before exploring the panels. Give yourself a clear view of the illuminated arrangement.
- Locate the existing line sections. Identify where those sections stop.
- Follow the route across the floor. Look for blank hexagons that prevent the sections from connecting.
- Place Cody and May on the missing links. Coordinate your positions so the necessary tiles are active together.
- Check the whole connection. Follow it from one end to the other and look for any remaining interruption.
- Move on when the route opens. Continue into the room containing the rotating pillars and stairs.
| What you see | What to check | Action |
|---|---|---|
| Several reflected patterns | The actual floor under the characters | Trace the existing illuminated route |
| A nearly complete line | Blank panels between its sections | Occupy the missing links |
| Both players standing on tiles without progress | Whether those tiles connect the intended sections | Recheck the route from end to end |
| An uninterrupted connection | The opened way forward | Continue to the pillar room |
Result: Solving the mirrored floor puzzle lets you reach the heart of the kaleidoscope.
Use short, specific callouts here. Name the lit section you are extending and the blank tile beside it. Avoid relying entirely on left and right when your cameras face different directions.
If the arrangement becomes difficult to read, stop moving and let the temporary tile lights reset. Then inspect the persistent pattern again. That gives you a cleaner starting point than continuing to activate panels without a shared plan.
The It Takes Two kaleidoscope puzzle asks you to maintain the correct connection together. Once your characters occupy the needed positions, hold still long enough to check the entire line before changing anything.
Solve the Heart of the Kaleidoscope Pillars
The final room replaces floor connections with rotating pillars, colored ledges, and staircases. Your objective is to line up the platforms so both characters can reach the object at the top.
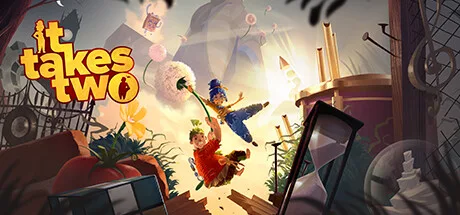 Image: Steam / Hazelight Studios
Here, one player operates a pillar while the other uses the route it creates. You then exchange responsibilities as you reach additional controls.
Keep track of the pink, blue, and yellow pillars, along with the green staircase. Those landmarks make the sequence much easier to communicate than describing everything as “this platform” or “that staircase.”
Step-by-Step Pillar Solution
- Split up at the entrance. Have one player stand on the green stairs while the other interacts with the pink pillar.
- Align pink with green. Rotate the pink pillar until its ledge meets the green staircase.
- Reach the blue pillar. The player on the staircase can now climb up to the blue pillar.
- Rotate blue toward the staircase. Use the blue pillar to create the connection that lets the player who operated pink climb the green staircase and reach the yellow pillar.
- Align yellow with pink. Rotate the yellow pillar until its platform meets a platform on the pink pillar.
- Board the yellow platform. Have the traveling player get onto that platform before rotating it onward.
- Carry the player toward blue. The player operating the yellow pillar rotates the platform around to the blue ledge.
- Finish together. Both players can now climb the yellow stairs and interact with the object at the top.
| Mechanism | Required alignment | What it enables |
|---|---|---|
| Pink pillar | Pink ledge meets the green staircase | One player reaches the blue pillar |
| Blue pillar | Blue connects with the green staircase | The other player reaches the yellow pillar |
| Yellow pillar | Yellow platform meets the pink platform | The traveling player boards yellow |
| Yellow pillar, rotated onward | Yellow platform reaches the blue ledge | Both players can reach the yellow stairs |
Result: Interacting with the object together completes the kaleidoscope sequence and takes you into Train Station, the next area of Rose’s Room.
Keep the Platform Transfers Organized
Before rotating a pillar, tell your partner which ledge you are trying to reach. Once the surfaces line up, pause and let the traveling player complete the transfer.
Use a simple rhythm:
- Name the destination: green staircase, pink platform, or blue ledge.
- Align the platforms: rotate the relevant pillar into position.
- Confirm the transfer: wait until your partner has boarded or crossed.
- Continue the sequence: move to the next alignment.
Avoid rotating away while your partner is still approaching a connection. The platform arrangement needs to serve the character making the crossing.
This last part of the It Takes Two kaleidoscope puzzle depends on taking turns. Each successful alignment puts a player in position to operate the next mechanism. Follow those handoffs through to the yellow stairs, then meet at the top to finish together.
FAQ
How do you solve the It Takes Two kaleidoscope puzzle?
Complete the illuminated floor connections by positioning Cody and May on the missing hexagons. Repeat that mechanic through the mirror room, then rotate the colored pillars to connect the stairs and platforms leading to the final object.
Can you jump across the kaleidoscope gap?
No. Jumping and diving will not carry you across it. Connect the colored wall hexagons using the floor tiles to create a crossing.
Why are the floor tiles lighting up without opening the path?
Stepping on tiles activates them, but progress requires a continuous connection along the intended route. Stop moving, let the temporary lights reset, and use the panels that remain illuminated to locate the missing links. Occupy the required tiles together.
Where is the It Takes Two kaleidoscope puzzle, and what comes next?
The kaleidoscope appears during Hopscotch in Rose’s Room, after the fidget spinner obstacle course. Completing the floor puzzles and rotating-pillar room takes Cody and May to Train Station.
Continue with
 It Takes Two Underwater Pipes Walkthrough: All PuzzlesUse It Takes Two underwater pipes walkthrough to tighten all three screws, clear the spinning fans, solve the dome puzzle, and restart the candy factory.
More in Puzzles

It Takes Two After Bull Fight: Clockworks Walkthrough
Stuck in It Takes Two after bull fight? Clear the debris, solve the wall and lantern puzzles, dodge the clock hands, and keep moving through the tower.
It Takes Two Clock Birds: Puzzles and Flying Guide
Solve the It Takes Two clock birds puzzles, learn the animal symbol order, fly between towers, and break shield mechanisms with this co-op walkthrough.
It Takes Two Clock Tower Moving Wall: Puzzle Guide
Solve the It Takes Two clock tower moving wall puzzles with May's clone, Cody's time powers, and clear steps for the crushing wall and vertical wall climb.

It Takes Two Ice Bridge Magnets: Step-By-Step Guide
Solve the It Takes Two ice bridge magnets puzzle with clear Cody and May roles, bridge alignment steps, and tips for crossing Snow Globe's tricky gaps.
Continue exploring
It Takes Two Can You Play Alone? Solo Play Explained
It Takes Two can you play alone? Explore solo play limits, two-controller challenges, Friend’s Pass, and ways to team up locally or online with a partner.
It Takes Two Online Co Op: Friend's Pass & Crossplay
Set up It Takes Two online co op with Friend's Pass, learn which platforms support crossplay, and fix Steam invites so you can start playing together.
Join the community
Official channels for news, updates and player help: